Home › Raised bed vegetable garden
Planning A Raised Bed Vegetable Garden
Designing a raised bed vegetable garden is easy...
... but designing one that is both pleasing to look at and very useable is slightly less straightforward.
Don't get me wrong - it's not rocket science, but there are a few key points that might not be immediately obvious.
They certainly weren't obvious to me when I built my first raised bed vegetable garden!
The tips and ideas below are the result of the elementary mistakes I made. I hope you find them useful!
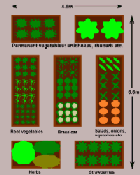
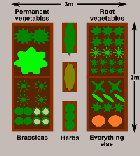
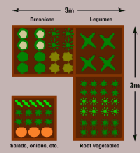
I have also included three sample plans to use as a starting point when creating your own design.
If you need more information about this gardening technique and links to other pages on this topic, raised bed gardening provides an overview and raised bed garden design outlines some general design principles.
Sample Raised Bed Vegetable Garden Plans
Click on the images or text below to see a larger picture and more information:
Tips and Ideas for your own Raised Bed Vegetable Garden
It is usually easier to grow vegetables in traditional rectangular units so that you can plant them in wide rows or blocks.
If you are lucky enough to have a reasonably sized space that you can devote to vegetables this is the best solution and allows you to maximize your growing area.
On the other hand, if you have a small garden with no room for a separate vegetable plot, you can create a more interesting and ornamental design by combining rectangles and squares with other shapes such as circles or octagons. (For some ideas on layouts see the sample raised bed garden plans for the ornamental garden).
When creating your raised bed vegetable garden, don't forget that it is very straightforward to attach trellis and netting to the raised bed frame to support vine crops such as beans and squashes. It is also easy to create tunnel cloches by attaching hoops and covering them with polythene or horticultural fleece.
The Key Points for Planning a Raised Bed Vegetable Garden
Positioning the Beds
It is important to position your beds so that they get the maximum amount of sunshine as most vegetables prefer full sun.
If this is not possible - and realistically it won't be in a small or urban garden, you can position beds in light or partial shade so long as you choose vegetables that tolerate these conditions (suitable vegetables include: peas and beans; salad greens; chard, spinach and kale; brussels sprouts, broccoli and cauliflower; radishes and beets).
Raised vegetable beds are usually best aligned north to south to maximize the amount of sun they receive.
Width of Beds
Make sure that the beds are narrow enough to allow you to work them from the sides without having to step on the soil.
A width of 1.2m (4 feet) is workable for most people but you can adjust this if you need to.
Length of Beds
The length is entirely up to you, anything from 2.4 to 3m (8 to 10ft) suits most people. If you make them much longer you will find yourself becoming exasperated every time you have to walk round the entire bed to get to the other side!
Height of Beds
The best height for most purposes is around 30cm (1ft). This is deep enough to accommodate most crops and yet doesn't require large quantities of construction materials and soil mixture.
If you have mobility problems you can. of course, make the beds higher.
Pathways
This is really important. Leave sufficiently wide pathways to allow you easy access with a wheelbarrow or garden cart and make sure that you can access the beds from both sides!
If the beds are 30cm (1ft) high, paths of 45cm (18in) are usually wide enough for a wheelbarrow - but do check first!
If the pathways are on soil you can cover them with a layer of bark chippings to suppress weeds.
An easy way to test your design before you build...
In the vegetable garden the raised beds can be created very simply by marking out rectangles with string and pegs and then digging over and mounding up the soil.
This can be a good way of testing a design to see if it works for you.
Try this method for a season and then build more permanent beds incorporating any necessary adaptations to your design.
Home › Raised bed vegetable garden


