Home › Patio ideas › How to build a patio
How To Build A Patio In A Weekend
If you are reasonably competent at DIY you can build a simple patio relatively easily.
This example shows you how to build a small patio made from reclaimed (secondhand) flagstones.
The entire project, from start to finish, was completed in a weekend.
You can easily source reclaimed stone from reclamation or architectural salvage yards and it is usually very reasonably priced.
If you don't have access to a reclamation yard, you can buy paving stones from most DIY stores.
The steps can, of course, be adapted to suit patios made from other materials.
How to Build a Patio Step 1: The Project
The design brief was to build a simple, but irregularly shaped, stone patio in a very compact garden to create a small area for sitting out in the shade of an existing tree.
The project was to be carried out as inexpensively as possible using York Stone flagstones from a reclamation yard.
How to Build a Patio Step 2: Draw a Plan on Paper
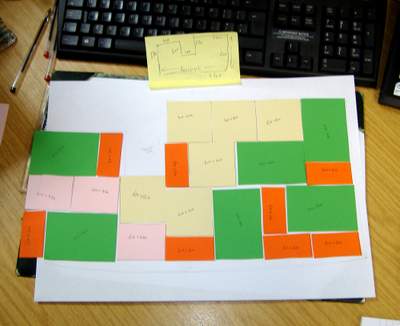
It is always worth taking the trouble to plan your patio out on paper first to make certain that it will all fit together as you had anticipated.
To make life easier try to work out a layout that does not require you to cut your stone flags or pavers - or at least keeps the amount of cutting to a minimum.
With this in mind, a plan of the proposed patio area with dimensions was made on paper.
Although all the flagstones were rectangular, they were all different sizes so each was measured and pieces of coloured card were cut to scale to work out a suitable layout and provide a template.
How to Build a Patio Step 3: Test the Design

After the design had been worked out on paper, the flags were laid on the existing turf to double check the layout, make sure that the general appearance was pleasing, and to identify potential problems such as variations in thickness.
This step may seem unnecessary but it is surprising how often it highlights problems, especially when you are working with flagstones or pavers of different sizes.
You may find, for example, that the different sized slabs are not arranged randomly and the patio just doesn't look right.
Identifying this before you actually lay the stones saves a lot of trouble later!
How to Build a Patio Step 4: Mark Out the Site
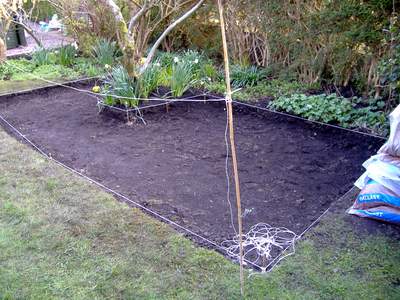
Once the layout had been finalized, the site was marked out by hammering pegs into the ground and stretching string between them to define the edges of the area.
You will need to place a peg at each corner and at every change of direction.
If you need to mark out a right angle, use a builder's square, if necessary extending its arms with longer pieces of wood for greater accuracy.
How to Build a Patio Step 5: Dig the Foundations
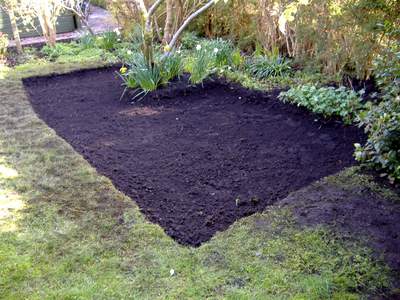
The turf was then removed and the site excavated to a depth of 22.5 cm (9in) to accommodate the foundations and the depth of the slabs themselves.
As the area was quite small it was reasonably easy to do this by hand but for a more extensive area, or a site requiring deeper foundations, you might prefer to hire a mini digger.
If your patio is going to be set into a lawn, it is important that it doesn't stand proud of the lawn surface or you will not be able to mow right up to the edges, so make allowances for this in the depth of your excavation.
How to Build a Patio Step 6: Prepare the Foundations
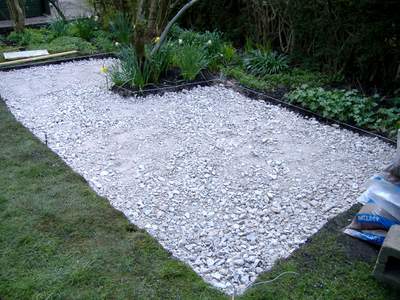
As the underlying ground was firm and well drained, and the flagstones not overly thick and heavy, it was decided that a basic foundation of hoggin (a mixture of crushed stone and clay), topped by a layer of ballast (sharp sand mixed with small stones and rock fragments), would be sufficient.
The hoggin, with its mixture of particle sizes, compacts well to form a firm sub-base, whilst the ballast evens out any irregularities in the hoggin layer and compacts to form a dense, level base for the flagstones. (As an alternative to hoggin you could use compacted hardcore.)
The soil in the bottom of the excavated area was tamped down to form a firm, level surface, and a 12.5cm (5in) thick layer of hoggin added. This, in turn, was tamped down before a 5cm (2in) thick layer of ballast was added.
How to Build a Patio Step 7: Lay the Flagstones
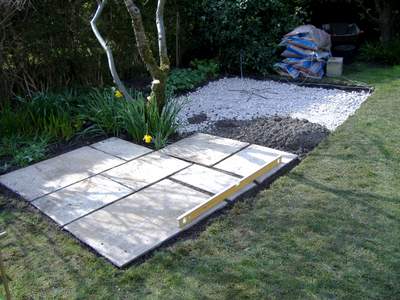
The flags themselves were placed in position using five small heaps of mortar at the corners and centre of each slab.
This method that makes it easier to make final small adjustments.
Each flag was firmed into place and a spirit level used to ensure that it was level with its neighbours.
Working with heavy slabs of stone is hard work so try to get some help with this part of the operation if necessary.
Once the mortar underneath had set, the gaps between the slabs were filled in using a dryish mix of mortar and the whole thing left to dry.
How to Build a Patio Step 8: The Finishing Touches
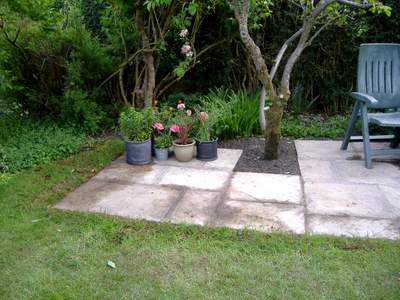
Once the mortar had set firmly, the patio was given a final clean with a soft brush and water and a group of containers and furniture added... just in time for a cool drink on a sunny Sunday evening!
The work on this patio was carried out by our good friend Simon of SDS Services based in North Lancashire, UK.
If you live in this area, and are interested in commissioning Simon to carry out some work for you, please use the Contact Us form to get in touch and we will happily pass on your request.
Related Pages
You will find tips on planning a patio at patio ideas whilst information on the different types of patio surfaces and paving materials available can be found at patio flooring.
Home › Patio ideas › How to build a patio
